| Back | Table of Contents | Next |
|---|
Grand Stairs
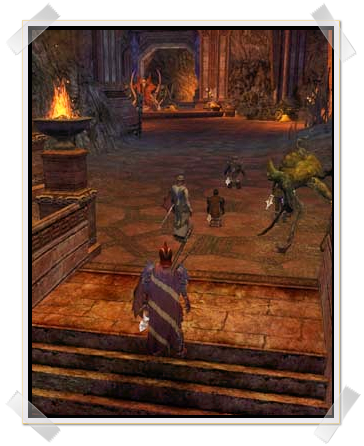
Entering into Igash's Throne Room
The Grand Stairs is considered by some to be the starting gate of all the hard mode instances but it is not a very forgiving instance. So if this is your starter point then you had better be on your toes.
The Grand Stairs is located in Redhorn Lodes at 10.1s, 103.7w. There is a summoning horn there and a hunter may make a camp there. The nearest encampment is called Orc Watch and you will find that at 11.0s, 10.6.9w.
This Hard Mode is activated by aggro'ing the second boss, Nardur, within the 10-minute window of the start-up script. Therefore the first rule is:
The first battle is with an orc (I've forgotten his name) who is pretty confident he can fear you to death.
The problem is that if you do survive his long ego-entrenched monologue then he can fear you to death.
In order to prevent this you should have your Infused Conhuith Draughts ![]() readily available.
He will disarm you if possible; if you have a skill to help you regain your melee weapon this will be the choice time to use it.
The braggart will announce "Feed me your fear!" just before he fears you.
This is a good time to be on the lookout for the fear
readily available.
He will disarm you if possible; if you have a skill to help you regain your melee weapon this will be the choice time to use it.
The braggart will announce "Feed me your fear!" just before he fears you.
This is a good time to be on the lookout for the fear ![]() icon which will be displayed beneath your morale/power bars.
If you do see the fear icon do not wait for anyone to cure your fear, immediately use an Infused Conhuith Draught.
The reason is not only does it eventually kill you but all that morale you are losing is being eaten by that nasty orc.
Do yourself and your fellows a favour and get rid of the fear asap.
As soon as this orc is down move on.
Remember, you are on a timer and the clock is ticking.
Do not loot yet.
icon which will be displayed beneath your morale/power bars.
If you do see the fear icon do not wait for anyone to cure your fear, immediately use an Infused Conhuith Draught.
The reason is not only does it eventually kill you but all that morale you are losing is being eaten by that nasty orc.
Do yourself and your fellows a favour and get rid of the fear asap.
As soon as this orc is down move on.
Remember, you are on a timer and the clock is ticking.
Do not loot yet.
The first spawn you will come to after that fear-eating-braggart-orc will be 2 Warg Riders and they are blocking your path across a bridge which you must cross. Dispatch them rapidly and then allow the Champion, if you have one, to move over the bridge first. You will place the Champion first because there are two sneaky goblins holding the stairs that descend from the bridge. The Champion can make use of a quick AOE and perhaps prevent one or even both of the goblins from attacking the Minstrel or Rune-keeper. Of course, everyone should work to dispatch these bothersome goblins asap.
Once down the stairs turn to your right and head over the next bridge. Be aware that there are two more sneaks on this bridge so follow the same strategy as given in the previous paragraph. Be care not to move too near the 4 Warg Riders that are circling around on the interchange there. Have a competent person pull. Hopefully the person you choose will be able to pull only 2 Warg Riders at a time. If there is a Hunter present he should place a trap between the meleers and the healers. If there is a Lore-Master she should lay down a sticky tar in the same position prior to the pull. Again, it is simply a matter for repeat rinse and wash before moving onto the next step. You will again turn right and go over another bridge.
At the next crossing interchange you will see descending stairs and at the bottom of that path are 4 Warg Riders circling a large pillar. Wouldn't you know it? You need to go directly to the other side of that pillar in order to aggro Nardur and aggro Nardur you must if you want to secure the Hard Mode. However you are probably running short of time by now. Follow the same strategy given for the previous Warg Riders, but with this one exception. This time, when the second set of Warg Riders is being pulled have the Captain (if you have one) or a Champion in Glory stance or a Guardian run past the pillar and up the stairs. Have the elected martyr run up to Nardur, who is to the left of the of the stairs as one exits them, and then continue to run up more stairs, over the side and into a sheer drop off which will land him (eventually) at the very bottom of an endless abyss. Yes, the martyr will die but that is what martyrs are for, n'est pas? Anyway, the martyr will not incur more repair bills than he already has but he will be blessed with the standard 10 minutes of dread. The Minstrel can remove the dread once the martyr rejoins the fellowship. Speaking of which, the designated martyr should rush to rejoin the fellowship without delay.
Now the fellowship can move on up the stairs towards the landing which Nardur holds in his iron grip. They should stop at the top-most stair just before the landing. Here they will all be able to see 3 groups made up 3 rather dirty orcs. I'm giong to give you a list of the attack order now based upon where those groups are standing. First, the strategy.
The entire fellowship needs to move mid-way down the stairs to be able to engage the fight there and of course, the healers should be even further down. If you have a Lore-master in your group then she should lay down a patch of sticky tar in the area between the meleers and the healers. This is a given and I won't mention it anymore. From this point on, assume that is where the sticky tar goes unless instructed otherwise. Meanwhile the Hunter will lay down a trap at the top most stair. The LM will pull by sleeping the orc-archer. As soon as the spell is released the LM will run back to the waiting meleers and on passed them into the region of sticky tar. The meleers will intercept and destroy whatever reaches them. When that spawn o'evil is defeated then the hunter will call whatever waits in the trap; now has come its turn to die. Meanwhile, the LM is watching for the orc-archer she slept and if it appears at the top of the stairs she simply sleeps it again. When the time has arrived for the orc-archer to be wakened the LM will wake it and run down to the pillar and behind it. In this manner, the orc-archer will be pulled into the waiting meleers where they can practice their cooking skills by making minced-meat out of him. Again, rinse and repeat with each group until Nardur is all that is left.
Now the order of the groups to be taken:
- Right group
- Center group (the group in front of the gate)
- Left group
The reason you pull the left group last is because sometimes, through either misadventure, negligence or just because, Nardur will join that group in their attack on you! Should this happen to your fellowship have everyone run back down the stairs and keep running until Nardur leaves the group; then turn and fight. You want to be able to select the place where you will fight Nardur because he likes to punt and punting on the Grand Stairs shortens the battle really fast and not to your favour.
Once the 3 groups have been retired have your fellowship run across the landing and place their backs against the unopened gates. Once everyone is in position select and send some courageous soul to go fetch Nardu. Of course he will monologue. Who doesn't? But he will come to you while he monologues. Now is that an improvement or what?! Fight him at the gate. Nothing more needs to be added here. After he is dead, loot the chest and move on.
You will be running back the way you came and now is the perfect time to loot all that stuff that you left behind. When you arrive back at the first platform, where you fought the orc-without-a-name-because-I-forgot-it, turn to your right and you will see yet another span which you must cross. There is a single anorexic patrolling archer-orc. He should be dispatched before your party reached the middle of the span because that is exactly where your party will stop and wait.
At the other end of the span there is another landing with stairs ascending upwards towards the future final resting place of Igash, but first you have to get there. On those stairs is another one of those anorexic patrolling archer-orcs. Perhaps you will want to put a mark on him so that he is not accidently called at any time? On the landing in front of the stairs are 2 groups of 3 orcs: one group is in the front guarding the exit from the span and the other group is guarding the entrance to the stairs. These 2 groups are made up of a warrior-orc and two shadow-menders. It's the shadow-menders which must be taken down first. You know how to do this. You have experience now! If you have a LM have him sleep one of the shadow-menders and then run back to the fellowship who is waiting near the middle of the span. The Hunter's trap will catch the warrior while the other shadow-mender waves his arms about in the air, but he too will come. Oh yes he will! When he arrives simply dispatch him and then call the warrior to do the same. When the team is ready they can move to the sleeping shadow-mender, wake him, and put him right back to sleep; permanently. Please don't worry about those damned totems. Yes. They will affect you but not nearly as much as the shadow-menders who will be healing the warrior and each other while you are trying to kill a totem. As soon as the totem is gone they will just summon another anyway. As the orcs say, 'Totem don't fetch themself you know'. So cut to the chase and kill the shadow-menders first and then the totems will not be nearly so bothersome.
After you have finished off the first group it is time to entertain the second group. Fairness, equality and all that sort of stuff, right? Once they are dead, have the Hunter pull the archer to the foot of the stairs and dispatch him there.
Now your party may move about 3/4 of the way up the stairs. Your pullers need to go to the top-most stair. Up at the top there is an orc-chain barring the entrance into Igash's throne room. Not like that is going to stop your fellowship, but still, the chains consits of 3 shadow-menders and 2 warriors and they don't look like they have missed very many meals. If you catch my drift. The Hunter should place a trap on the landing without ever stepping onto the landing. If you have two hunters: Hooray! Have the second one place a trap between the meleers and the healers. The LM should lay down a liberal coat of sticky tar. If you have a Burglar he may be able to mezz one of the shadow-menders. However you choose to get them into the waiting arms of your meleers is great. Just don't bring them all at the same time if you can prevent it. You certainly don't want to fight them where they stand.
There's no better time for a break than now!
Since you are back we can move ahead to the final fight. As soon as you pass the second set of banners at the entrance to the throne room Igash will begin his monologue. There is no turning back now. This is not a mind bending strategy but it is also not as simple as it sounds. If you have a Champion and a Hunter, they can kite Igash around his throne taking turns with aggro; we call this ping-ponging aggro. If you have two Champions they can do this but so can two Hunters. As a matter of fact the only combination that you might want to avoid is Minstrel and Lore-master. That is because if the Minstrel is kiting he won't be healing and if the LM is kiting he won't be feeding power to anyone. See how easy this is going to be?
Seriously though, the Lore-master will be taking power and feeding it to the Minstrel first and then whomever else needs it. She will also be laying down tar in front of the throne whenever the chance presents itself and she will be healing wounds left and right. The Guardian will be tanking the Devoted and the archers. Whenever an archer decides to leave the Guardian's company someone will grab his attention and take him back to the company of the guardian.
What you will see happening is Igash setting his kiters on fire periodically.
Of course, he is going to announce his intention by calling out: "Let the fire swell to take you, Whatsyourname."
When this happens to you don't just stand like an ignoramous in the middle of the fire.
Get out of there and use an Infused Healing Draught ![]() as quickly as possible.
If it's on a timer then let the Lore-Master know so she and use Leechcraft
as quickly as possible.
If it's on a timer then let the Lore-Master know so she and use Leechcraft ![]() , but remember, you are not the LM's primary focus.
Yes indeed!
The LM is going to be busy for a change.
The Minstrel or Rune-keeper and even the LM are all going to be very concerned with the guy who is keeping the Devoted company.
Why?
Because when that guy dies your team might just as well run out of the throne room and down those same stairs they just ran up.
This will reset the battle.
Should this happen, every advantage you have won will reset to zero.
/sigh.
, but remember, you are not the LM's primary focus.
Yes indeed!
The LM is going to be busy for a change.
The Minstrel or Rune-keeper and even the LM are all going to be very concerned with the guy who is keeping the Devoted company.
Why?
Because when that guy dies your team might just as well run out of the throne room and down those same stairs they just ran up.
This will reset the battle.
Should this happen, every advantage you have won will reset to zero.
/sigh.
As for the kiters: if one of you stand in front of the throne you can swipe at Igash as he runs through you. Oops! Did I just say 'through you'? Indeed I did. Whoever is kiteing Igash at the time needs to run him in a set pattern that will not change. The kiter needs to run him through the DPS = Alt Kiter. Don't look back, don't second guess what your fellow team members want. The fact is that they are expecting you to kite Igash in a very predeictable manner. Your job, therefore, is to be very predictable. Don't worry about Igash catching on to this; he is an orc and given to long monologues, not sincere strategies.
Speaking of monologues, when Igash reaches about 50K morale he will begin panicing (although he not about to tell YOU that).
He will begin issuing massive damage AOE attacks.
It is very advisable for everyone to move away from these AOE attacks, if possible.
They do hurt!
If able to do so, the kiter should try to place Igash behind the throne when he announces an incoming attack.
(Typical orcish style, you know.)
Perhaps the kiter will have Igash where you want him when it happens, perhaps not.
If not is the case then everyone should have an Pure Athelas Essence ![]() pot at the ready.
But this is not the worst of it.
pot at the ready.
But this is not the worst of it.
At around 25k morale Igash goes hog-wild in his attacks. If you are a kiter and you have any type of skill which will mitigate damage you should use it now! If you have a Captain, then somewhere between 18-12K moreale for Igash, the Captain should enter into Last Stand.
The fat lady has sung, y'all. Now kill the brute!
When Igash dies the Devoted will leave; broken hearted, no doubt. The archers will remain. If you havenn't had enough battle yet then by all means consider it pay back time and dismember them However, if the chests are your main concern then you might consider have the archers' tagets run down the stairs. The archers will follow and vanish into thin air.
In a certain chest there will be a platinum coin which can be bartered with a certain class trainer in the 21st Hall for a very nice pair of boots. Wear them well and with pride! Oh, and don't forget to thank your fellowship for help they extended you in acquiring them.
Ok, now what the classes advise.
Burglar: You should have the ablilty to mez, pull, and create a FM whenever you can. During the Igash fight, the FM should be set to 3 green and 2 blue (Pure of Heart) in that order.
Captain: Have the appropriate banners and place them properly. The Captain is a good choice to tank the runaway archer in the Igash fight. Oh, and you must be willing to become a martyr as well as being able to time your Last Stand appropriately.
Champion: Know your skills and stances. If you must serve in the capacity as a tank then change your traits to mitigations and become a Marshal Champion. You might want to consider investing in a very good shield also, since you will lose your 2 weapson. If you are not the tank then realize you are not the star of this show and be ready to maintain your health because the Minstrel is going to be really busy during the Igash fight.
Guardian: Use Challenge, Fray the Edge, Guardian's Pledge, Challenge the Darkness, Litany of Definance, Shield Taunt, and now and again you may use Engage. Whatever you do though, do NOT kill the Devoted. And put your bow away. A very good guardian I once knew advised: "Whilst you are kitting, use the Archers to your advantage by targeting them and using Guardian's Ward as often as possible. This means that you are gaining the stat buffs but not hitting the Devoted to do so." - Galathorn
Hunter: Get your Rain of Thorns up to par, lay down traps so that they can stop the spawn from reaching the healers. Do not ever use Bards Arrow when there is the very slightest chance that the feared monster will return with friends. Go all out on the last 25k of Igash IF you are NOT his aggro target.
Lore-master: Never, never, never have your pet in anything else but passive stance in any raiding instance. If you can't control your pet then don't use it. Celdric suggests that you use the Eagle for the extra power during the first part of Igash's fight. When Igash is at 55k morale though, change the eagle out for the Raven, if you can. If you are not going to be able to make this change out then make your Raven the pet to start with. You must have Leechcraft ready for use during combat. Use Fire Lore Melee Damage debuff on the Buss and alternate the All Seeing Eye and Sign of Power. Now and again, during your spare time, throw a heal the guardian's way.
I haven't heard a word from any Minstrels, Rune-keepers, or Wardens. If you have some friendly advice I would be happy to add it here.
Namarie, y'all! Hope y'all found this walkthrough useful.
Last Updated: July 2009 at 11:50am