Cooking
Wednesday, 24 - March - 2010
Oven Temperatures ~ Measurements ~ Cooking Techniques
A recipe is like a road map. Before you can follow a recipe you must have some understanding of what it is trying to tell you.
First, I made an effort to identify the difficulty level of the recipes by using the colored stars. Keep in mind though, what may be difficult for one person might be simple for another. Also, using the proper tools makes everything easier but my goal is that the beginner cook who has the basic tools to be able to reproduce these recipes. Cooking is an art and like any art the beginnings are simple. What you will not find an approximate preparation time because a cook's proficiency in the kitchen is always going to be based upon their familiarity with what they are doing. In other words: the more you cook, the faster you will become when you cook.
I would like to assure you that I have cooked and tasted each and every recipe found on The Daily Biscuit.
They have been made in my kitchen and approved by my friends, family and myself.
If I receive a recipe I assure you that it will not be included on this site until I have cooked it and tasted tested by my family and friends.
My criteria for what type of recipe to be included on The Daily Biscuit is that it must be tasty.
Bon Appetit!
and approved by my friends, family and myself.
If I receive a recipe I assure you that it will not be included on this site until I have cooked it and tasted tested by my family and friends.
My criteria for what type of recipe to be included on The Daily Biscuit is that it must be tasty.
Bon Appetit!
 Novice
- The only time you have ever been in the kitchen is when your mom called you to come eat or you were raiding the refrigerator. This is designed to give you a starting comfort range in the kitchen and yes, it is more than boiling water. However, if you have never boiled water then you should visit the Cooking page because it will help you set up a starter kitchen at a minimum cost.
 Beginner
- You understand the basics of the kitchen operation and you are semi-comfortable looking at more complicated recipes. OMG! You are even beginning to enjoy cooking!
 Competent
- You are no longer afraid to open a cookbook and you actually sharpen your knife before using it, every time! While browsing through a store that supplies cooks' tools you splurged and bought a really cute timer.
 Proficient
- You are able to prepare a meal so that all the courses are ready at the proper serving times. You understand the language of cooking and you experiment a little; sometimes it is really good!
 Advanced
- You know what you have in your kitchen and in your pantry and where it all is. You are currently or already have invested in better quality cook's tools. You are comfortable preparing meals both large and small. You have discovered you can discern the ingredients of a recipe when you eat out. You have also gained weight and discovered why cooks love to entertain guests.
 Master
- Nobody turns down an invitation to your dinner parties. When it is a pot luck at work, everyone asks you first what you plan on bringing. (You suspect they are planning their pots based on yours.) You are very proud of your knifes and, at the very least, own a copper bain marie with a ceramic insert.
I am not a nutritionist nor a professional cook so please don't expect that level of expertise from me. Why this section is here is because several people, including my children, have asked me for my recipes and I've gotten tired of writing them down.
By the way, if you would like to add a recipe please send it to me at administrator@thedailybiscuit.com and I will consider adding it to this site. Please make sure you give me your name if you want to recognized for the recipe and any other information you wish to be noted as well.
Back to the top
Temperature Conversions for Ovens
| . . . . | ||||
Until I had come to France I had never seen an over with numbers ranging from 1-9 instead of degrees marked in Farhenheit.
It was trial and error until I found an oven thermometer in Farhenheit, but I thought all ovens in Europe were marked by 1-9.
I really didn't like that system. Later we had a digital oven that increased 5 degrees Celcius.
So I have rounded off all the temperatures to the nearest on my Farhenheit thermometer but now I am comfortable cooking with Celcius.
 If you are wondering where the terms of Slow, Fast, Red, etc., came from, well, they were the terms my Great-grandma Dickey in Ingram,Texas.
I don't remember all the terms she used related to cooking but I do remember the stove because it was hot!
She lived to a noble old age and up until two years prior to her death she still cooked using her behemoth of a wood burning stove.
This is not an of my Grandma Dickey's stove but this is how I remember it.
(It was quite impressive for a 4-year old child!
Oh, how very badly I wanted to be allowed into the kitchen to do what all the other grown-up women did with that very dangerous beast.)
Anyway, Grandma Dickey used these terms to describe the various oven temperatures in the recipes she passed down to her children, grandchildren and which I later inherited.
I do apologize if my memory is faulty on this topic.
If you are wondering where the terms of Slow, Fast, Red, etc., came from, well, they were the terms my Great-grandma Dickey in Ingram,Texas.
I don't remember all the terms she used related to cooking but I do remember the stove because it was hot!
She lived to a noble old age and up until two years prior to her death she still cooked using her behemoth of a wood burning stove.
This is not an of my Grandma Dickey's stove but this is how I remember it.
(It was quite impressive for a 4-year old child!
Oh, how very badly I wanted to be allowed into the kitchen to do what all the other grown-up women did with that very dangerous beast.)
Anyway, Grandma Dickey used these terms to describe the various oven temperatures in the recipes she passed down to her children, grandchildren and which I later inherited.
I do apologize if my memory is faulty on this topic.
∗ I do suggest that you buy an oven thermometer and a meat thermometer. Both will help you a great deal in preparing meats. |
||||
| . . . . | ||||
| Oven Temperatures | ||||
| Description | Fahrenheit | Celcius | Mark | |
| Very Slow (warming oven) | 225-250 | 110-130 | ||
| Slow (slow cooked red meat stews) | 275 | 140 | 1 | |
| ... (just like 325 for same meats) | 300 | 150 | 2 | |
| ... (pound cakes) (poultry, veal, game meats) (quiche) | 325 | 170 | 3 | |
| Walking (cakes) (beef, lamb) | 350 | 180 | 4 | |
| Medium | 375 | 190 | 5 | |
| ... (cornbreads) (tarts, pies) | 400 | 200 | 6 | |
| Fast (soft flat breads) (cobblers) | 425 | 220 | 7 | |
| ... (pita breads) | 450 | 230 | 8 | |
| Hot (yeast loaf-breads) | 475 | 240 | 9 | |
| Red Hot (pre-heat for breads) (crackers) | 500 | 250 | ||
| . . . . | ||||
Back to the top
Measurements & Conversions
| . . . . | |||
|
I have to be absolutely straight forward about these measurements.
First, I seldom measure anything but whenever I do I use a digital read out scale and that scale is metric.
Last time I was in the USA I brought back some measuring spoons and cups for the sole purpose of this chart given below.
My method was to write the recipe as I prepped; measure by sight/feel to measuring spoons/cups to scale.
The truth is that method doesn't work very well.
Solids, wets, drys do not have the same weights per volume.
A tablespoon of cream is not going to have the same weight as a tablespoon of pepper corns or a cup of cornmeal is not going to weigh as much as a cup of packed brown sugar.
You see the problem?
The result is that I have defaulted to the metric system and converted only when I think it is necessary, because if the truth is told, all of that all that measuring is just plain boring.
If you would rather not measure all you need to do is pay attention to the measurements the first few times you cook and soon you will develope an eye for quantities.
It is also to your benefit to use a standard that is not going to change.
The standards I have found are Pyrex.
Pyrex mixing bowls have remained the same size ever since I can remember.
These bowls are inexpensive, sturdy and easily stored because they nest in each other.
My only wish is that Pyrex would sale 3 sets that would eventually nest in each other.
My wish fulfilled would be Pryrex nesting bowls of 6qt, 5qt, 4qt, 3qt, 2½qt, 2qt, 1½qt, 1qt, ½qt.
I do wonder what I would do with a 6qt bowl though, since I no longer make bread 3 times a week.
Ramekins do double duty in my kitchen.
They are, of course, used to bake with.
But they are also used to hold smaller amounts of ingredients.
That's because there is never enough storage space in any kitchen so the only solution is for an item to serve become multi-functional whenever possible.
I am sorry to say that measuring spoon and cups do not meet that need.
As a matter of fact, the only thing that a measuring cup has that a mixing bowl doesn't is the pouring spout.
Pretty sad, huh?
Anyway, I encourage you to learn to measure by using the metric scale as it is far more accurate to a finer degree than US standard measuring tools used in cooking. The measurments in this chart are the same I learned when working in hospital pharmacies. Just remember that dried herbs are not the same weight as other dried forms such as sugars and that for volumes liquids are (as a standard) heavier than than the equivlant volume of dry. Also, you may not be aware that the spoons that are included within your flatware set are not accurate measures. They can be off by over half of the recognized measure so it is never suggested that you use these types of spoons for any type of measurement. It is also good to know that a teacup is traditionally only 6 fluid ounces or 180 milleliters. If you are using a teacup for dry weight then that is 6 ounces dry or &frac3/4; cup, 180 grams dry weight. I have never seen a single recipe call for a teacup as measurement, but if you are starting out on a shoestring budget this is good information to have. |
|||
| ... | |||
| Liquid Forms | Abbr. | US Measure | Metric |
| Teaspoon | tsp or t | 60 drops or 60 gtt | 5 ml |
| Tablespoon | Tbsp or T | 3 t | 15 ml |
| Fluid Ounce | fl oz or oz | 2T | 30ml |
| Cup | cup or c | 8 fl oz | 240 ml |
| Pint | pint or pt | 16 fl oz or 2 c | 480 ml |
| Quart | qt | 32 fl oz or 2 pt | 960 ml |
| ... | |||
| Dry Weights | tsp and Tbsp are approximately the same as liquid measurements | ||
| Grain | grain or gr | 1 grain | 60 mg |
| Grains | grains or gr | 15 gr | 1 g |
| Ounce | oz | 2 T | 30 g |
| Pound | lbs | 16 oz | 480 g |
| ... | |||
Back to the top
Cooking Terms & Techniques
A recipe is like a road map. Before you can follow a recipe you must have some understanding of what it is trying to tell you. I will be adding more to this list over time. If there is a cooking term you don't understand or that you wish to clarify or be clarified please don't hesitate to write me.
Braising
Brining
Once the item is brined remove it and pat it dry with clean paper towels or allow it to rest on a rack placed above the sink for drain for 10-15 minutes. Disgard the brining solution because it can not be reused nor used to cook with.
Deglazing
Marinating
Here is another little something I do before cooking a meat which has been marinaded. When I take it out of its plastic I blot it lightly to remove the excess marinade before grilling, broiling or frying. I found that the meats look nicer when I do this and I think they may just taste a bit better also.
Pan Roasting
Poaching
Roasting
-
Basting meats that are dry roasting, such as poultry, is a must.
Basting can be accomplished useing a large long-handled cooking spoon or a baster
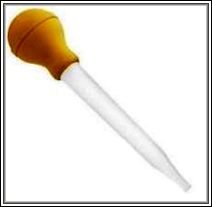 .
It is a simple operation.
You remove the roasting pan with the roasted item in it and by taking the fat (called drippings) from the botton of the pan you then spill them over the top of the roasting food item.
Repeat this procedure every 30 minutes until the roast is done.
By the way, you don't have to use that fat in the bottom of the pan.
I don't because I don't like the flavor and I am not about to remove a roasting dish every 30 minutes just to bast the roasted item.
I make my own basting fluid and keep it warm on the lowest setting on the stove top.
You can find the recipe for Basting Sauce under Soups and Salads.
.
It is a simple operation.
You remove the roasting pan with the roasted item in it and by taking the fat (called drippings) from the botton of the pan you then spill them over the top of the roasting food item.
Repeat this procedure every 30 minutes until the roast is done.
By the way, you don't have to use that fat in the bottom of the pan.
I don't because I don't like the flavor and I am not about to remove a roasting dish every 30 minutes just to bast the roasted item.
I make my own basting fluid and keep it warm on the lowest setting on the stove top.
You can find the recipe for Basting Sauce under Soups and Salads.
-
Carving is really a challenge for me so I feel like a bit of a hypocrite even writing about it.
Never the less, I will proceed.
Once the roasted food is taken out of the oven it should be allowed to rest for 5 to 15 minutes, depending on the type of item which has been roasted.
Resting the meat allows time for its interior juices to stop cooking.
It means that the meat will be easier to carve and that the juices inside the meat won't escape in steam.
You may form a tent to cover the item while it rests the required time but do be aware that this will cause a pocket of steam to form and the exterior texture will be compromised.
My advice for the rest of carving is to buy a beautiful carving knife and fork set and give it as a gift to the person you have chosen to be the carver; in my case it is my husband. If they don't already know how to carve various meat you must practice patience and it is also nice to provide them with a set of instructions. Set aside a place out of sight of the guests where they can perfect their skill and only when the carver is confident is it time to place the whole untampered with roast on the table. - Resting Temperature has two functions. One is to bring the meat to an even temperature before placing it into the oven and the second is to allow the meat to set before carving. No meat should be out of refrigeration for more than two hours prior to roasting with the only exception being allowed for defrosting the meat. I generally take the meat out of the refrigerator at the same time that I am preheating the oven. This gives me ample time to trim, stuff, season, brown, and tie the meat (if necessary) before placing it into the oven for roasting. I do like to allow the roasted meats to cool slightly before presenting them at the table.
- Trimming is something all cooks master easily because it is a must for roasting. All meat comes from a muscle of sometype and all muscle is wrapped in a membrane over which is a layer of fat. Fat burns which not only smokes and smells bad but can adversely affect the taste of the meat. Membranes shrink when heated and this causes the meat to curl which then affects the browning aspect of the meat and the taste. Trim off fat until only 1/8-inch or 3-4cm is all that remains. Take a sharp knife and cut through the membrane with the tip of the knife at 1-inch or 15cm intervals.
- Trussing is the lacing up the opening of a chicken or turkey before roasting it. I think it is pretty useless but it is easy enough to do with a large needle and cooking twine. It will make a prettier roasted bird to set on the table before carving so if you are trying to impress people then learn to truss.
Searing
Stewing
Back to the top
If you have any questions or suggestions regarding this site you may contact me through email at:
susannah@thedailybiscuit.com
